CQRS Local Commissioning Administrator Account Management
If you haven’t already got a CQRS Local Commissioning Administrator account, please register. The CQRS Service Desk will then approve your account. Please regularly check your emails and click on the link within the email to complete the account registration.
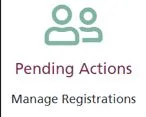
Pending Actions – Managing Registrations
When a GP practice user registers for a CQRS Local account, their request will be within this section.
- Log into CQRS Local.
2. From your home page, click on the Pending Actions menu tile.
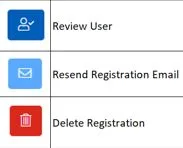
3. Click on the Review User button.

Note: You can sort each column by date or by approval etc by clicking on the header arrows.
4. To Approve this account, select the Approve option and then click the Confirm button. The user will then receive notification via email that their account has been approved. They should then click on the link to complete the registration set up. Once confirmed you will see them in the Users section.

Note: If you need to Reject the registration, you will need to give a reason and then click on the Confirm button. The user will then receive notification via email that their account has been rejected. Please note that you will need to reject any requests where a generic email address has been used and the name doesn’t identify an individual. Such examples are shown below.

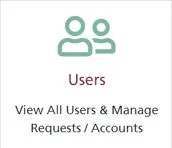
Managing your System Users
You will also need to check any requests that are within the Users section. These are, for example, Practice Managers who have had an account previously approved and have requested access to an additional GP practice.
- From your home page, click on the Users menu tile.
2. Click on the Review button and follow the same steps as above.

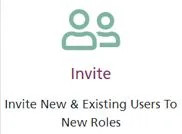
Inviting New and Existing Users to New Roles
As an Administrator you have the ability to invite a user rather than them registering for an account.
- Click on the Invite button.
2. Enter the users email address and click on the blue arrow button.
3. Enter the first and last name of the new user and click on the Next button.
4. Select the organisation you want to invite the new user to and click Next.
5. Next is to select the role you wish for the user to be set up with and click Next.
6. An email invite will generate. Check that everything is correct and then click Send.
Revoking a User Account
Revoking an account is when you remove all access to an account associated to that organisation. The user will still be able to login using their credentials and will still be able to get to the My Profile page and then can request access to another organisation.
- From the CQRS Local homepage, click on the Users menu tile.
2. Find the user whose account you wish to disable and click on the View button.
3. Scroll down to the bottom of the screen and click on the red Revoke button.
4. Click the Confirm button.
Re-enabling a User Account
Re-enabling a CQRS Local account will give the user back their access.
- From the CQRS Local homepage, click on the Users menu tile.
2. Find the user whose account you wish to disable and click on the View button.
3. Scroll down to the bottom of the screen and click on the blue Enable Account button.
4. Click the Confirm button.
Disabling a User Account
Disabling an account – this is in effect an account deletion (their data is retained for audit reasons) so if they try to login into the application, they will be notified that their account has been disabled and therefore will be unable to access CQRS Local for all organisations they are registered at.
There are two ways in which this could be done. Firstly, the user themselves could disable their own account, if for example they no longer required access. Secondly, this can be done by the Administrator. The below instructions will be for the Administrator to disable the users account.
- From the CQRS Local homepage, click on the Users menu tile.
2. Find the user whose account you wish to disable and click on the View button.
3. Scroll down to the bottom of the screen and click on the Disable Account button.
4. Select a reason why you are disabling the account. There is an ‘Other’ option, which if selected will prompt you to enter some information. Please enter as much detail as possible up to a maximum of 250 characters.
5. Click the Confirm button.
What the Buttons Mean
Version 1.1, January 2024